

A cousin of mine is a known miser. Whenever it comes to giving gifts, he is known to count pennies and work out something that would touch the lowest rung of acceptable gift for any occasion. He recycles a lot of stuff, even giving out used stuff every once in a while. He has gotten a little better after acquiring a beautiful wife, who is a lovely woman with a heart large enough to encompass the Bay of Bengal. But he continues to count his pennies, though he hasn’t been able to make that fortune penny-pinchers are often rumored to make (not that it worries him too much, silver spoon and all, lol!).
He has never been scroogy when it comes to me, at least not in ways that truly count. He is one of my favorite cousins. While he still is a tightwad when giving gifts, he puts in a lot of effort whenever he chooses gifts for me. Which is sweeter, because being a skinflint requires him to be more creative and thoughtful.
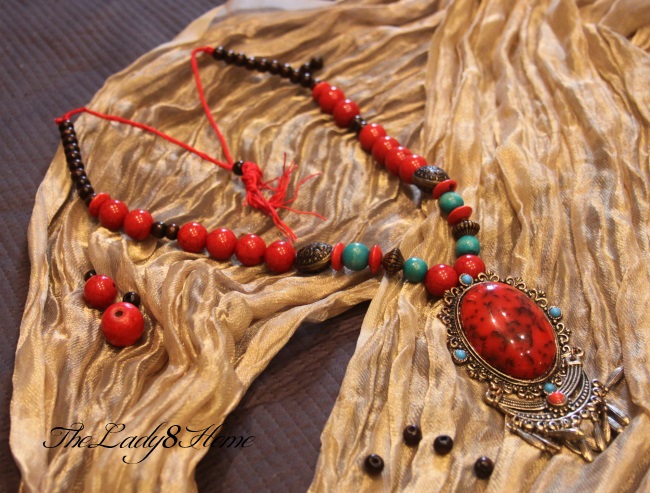
I love chunky neck pieces. I collect them, and wear them often. So this time when I visited India, my cousin found me the most spectacular, beautiful neck pieces I ever saw.

The beads in the necklace were interesting enough, but what made it stunning was a huge locket. Encased in gilded costume gold is this gorgeous oval fiery stone that has streaks of brown flowery lines webbing the entire surface.
I wore it with a huge smile, and it drew appreciative glaces everywhere I went.
One night, while I was in the process of climbing out of the car, I felt something jingle in my lap while I moved. I wasn’t sure what it was in the dark, and I paused to check it. It was the locket. In my lap!! Even as I was processing this unsavory bit of fact, I heard the beads spilling all around me. As I watched in dismay, many tumbled down on the road.
I scrambled around to save as many as I could. Unfortunately, most beads rolled out of my reach, under the carriage of the car. It was too dark for me and my sweetheart of a niece to see where they all went, and we did try to rescue as many as we possibly could. I cradled the orphaned locket and stray beads back into the house, my hunched shoulders reflecting my forlorn state of mind. I had no hope of rescuing any more of the beads, because they stood no chance of surviving the onslaught of cars travelling on that road throughout the night. My niece Antara (Whatever I have said or sung) actually woke up early next morning to find if she could salvage a few more, without much success though.
I bagged my precious rescued beads and the locket in a zip lock, and stored it away for the rest of my trip. Back in US, I started exploring the options of getting the necklace back in its place – my neck. I made several trips to local craft stores, big and small, and finally, found a number of beads that would now make the necklace whole. Next came the wire/cord that would hold it all together. This part was a lot more challenging than I initially thought. I bought a few varieties of beading threads, including cotton,plastic and leather.
The first two attempts were total disasters. The third, was successful.
To re-invent an existing bead necklace, or to make a new one, you will need:
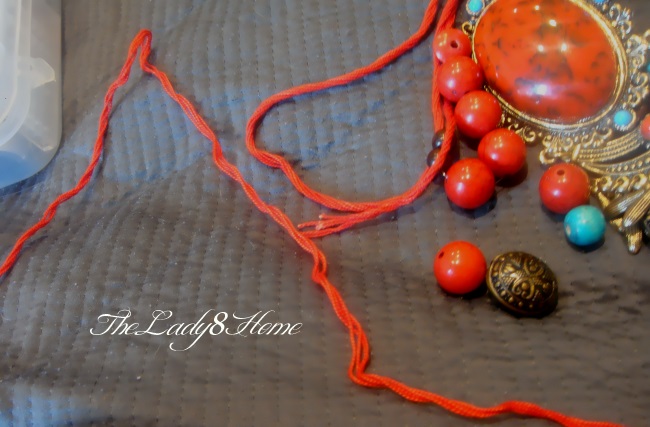
Beads and an appropriate cord.
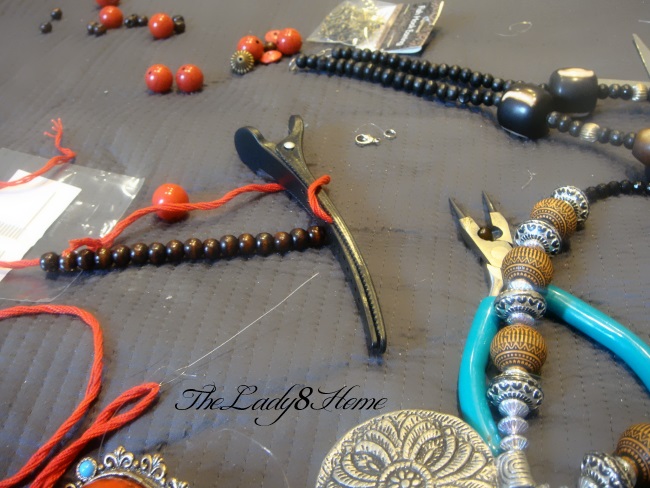
A clamp (I used a hair clamp), Crimp-cutter-nose pliers tool.
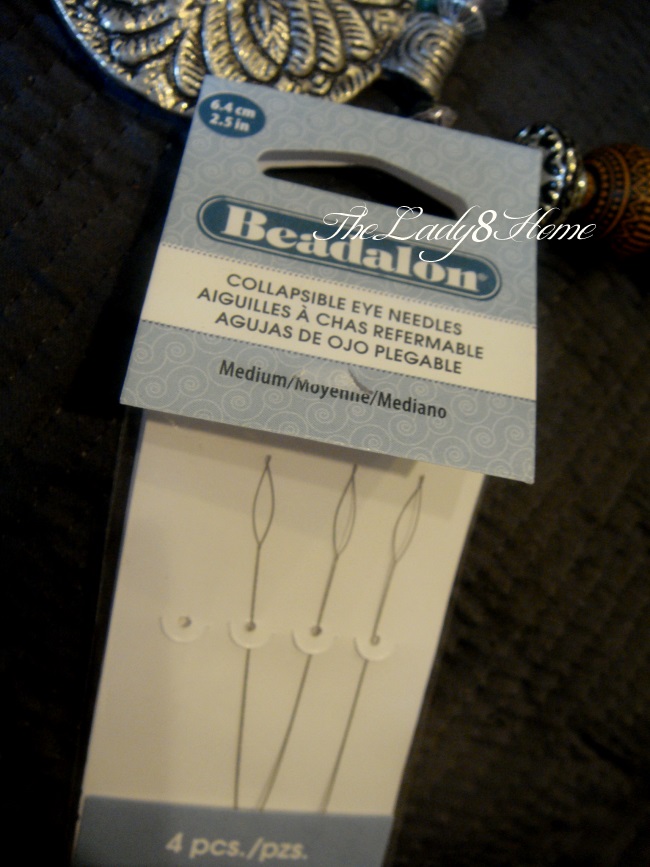
beading needles (crafts stores)
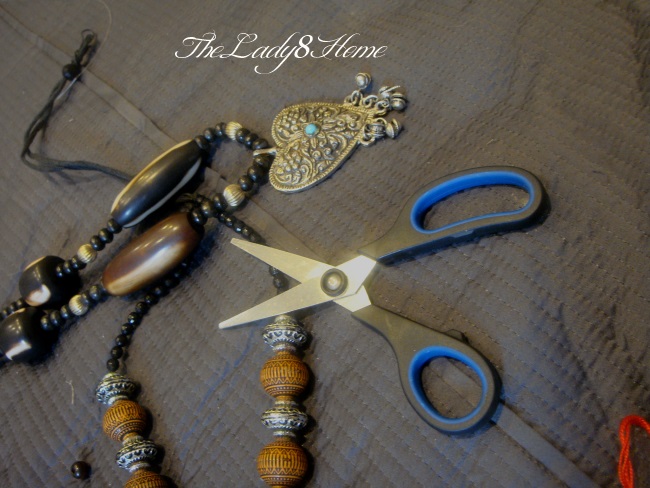
scissors
How I made this necklace:
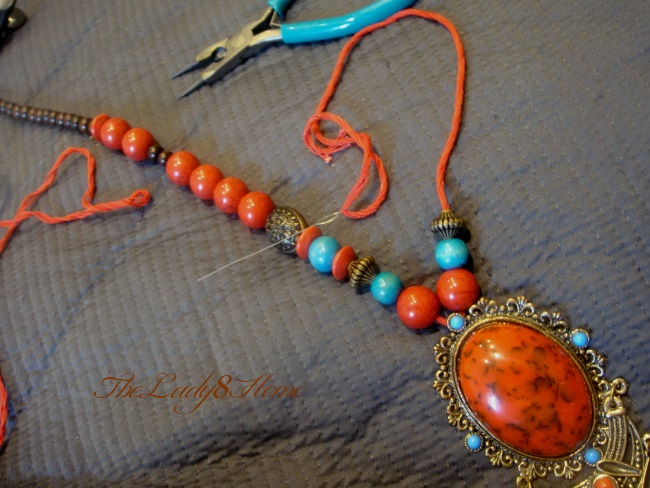
1) First I decided on the length of the necklace. I wanted it longer, and more sturdier. I also wanted a tassel end, that forms a loop at the nape of the neck with a tassel knot hanging between the shoulders. Also, count the beads, there should be equal number of beads/ stones on each side of the locket/center piece.
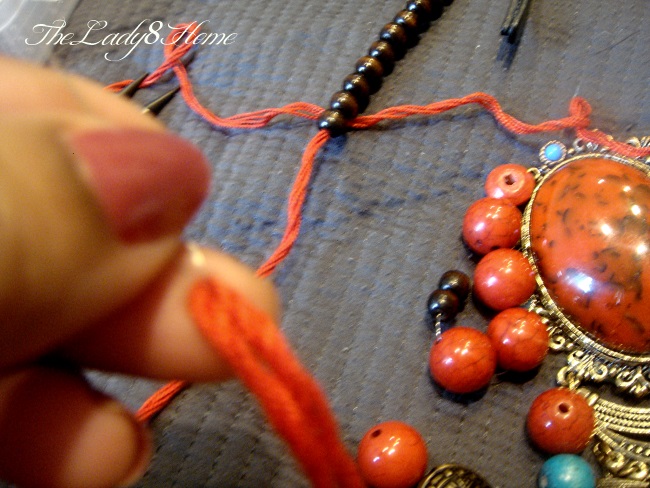
Decide the length of the wire/cord and then insert it through a needle
2) To hold the first and the consecutive beads in place, I clamped one end of the cord with a clamp.
Clamp one end to prevent the beads from rolling away.
3) As I strung the beads, I used the crimp tool to nudge them along the thick cord.
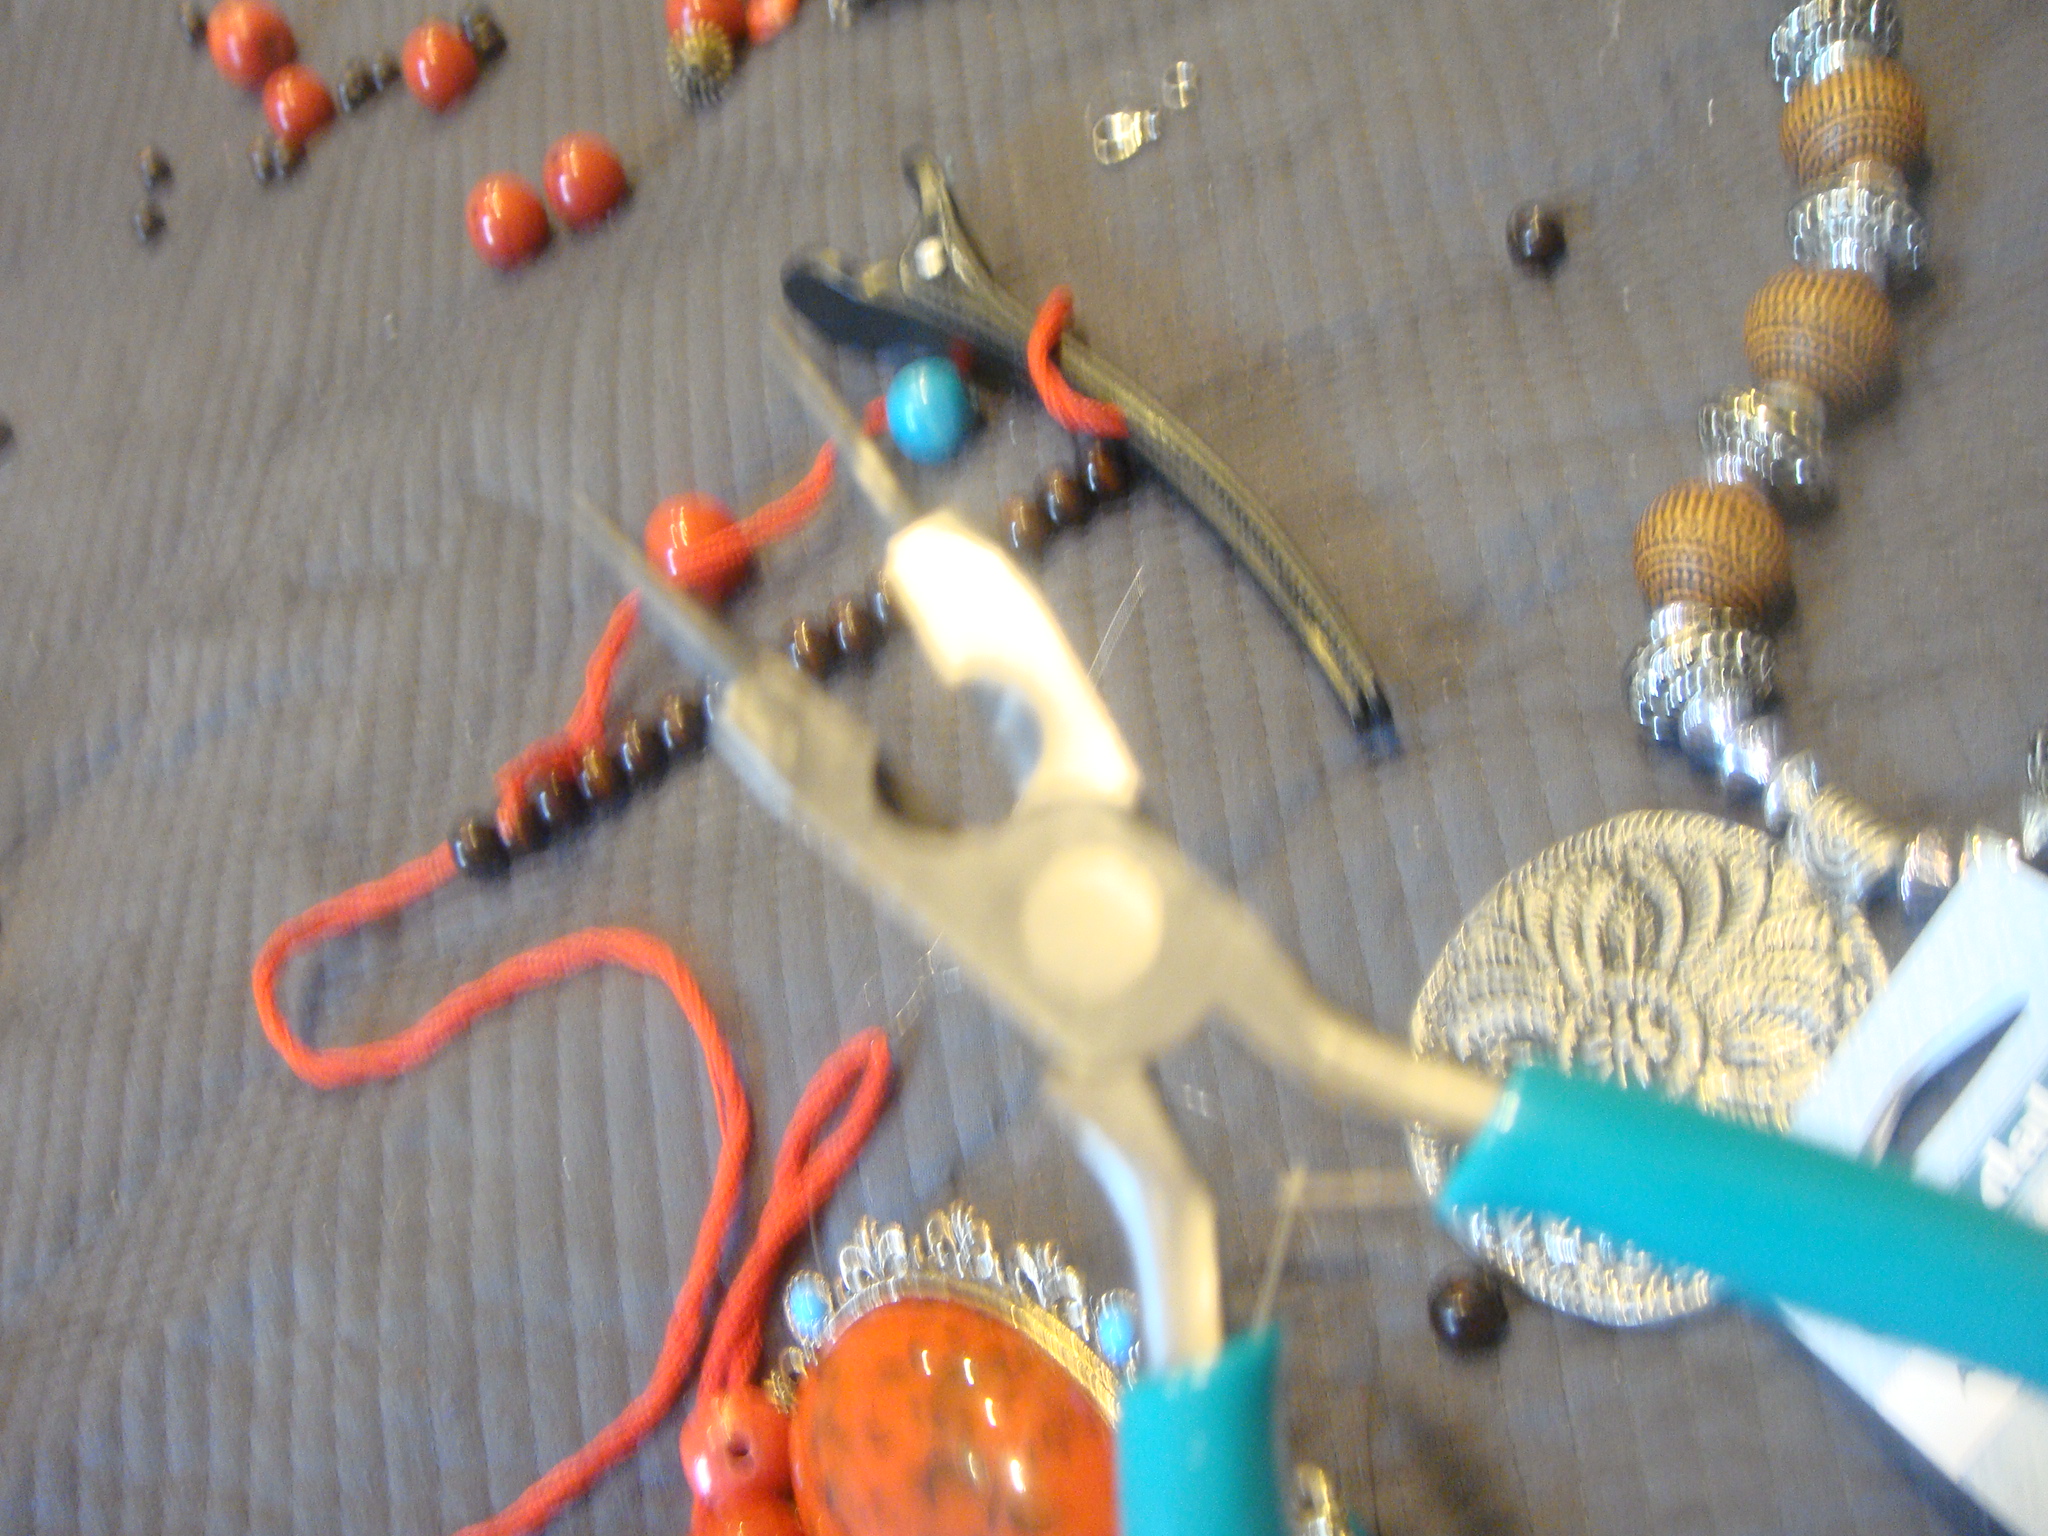
Start stringing the beads one at a time, using the crimp took to position the beads or help it glide on the cord to its position.
4) I kept stringing till all the beads are placed according to the design.
Keep stringing gently till all beads are in.
5) Finally, I chose a bead large enough to accommodate both ends of the cord through its opening, but small enough to be a snug fit so that it held the necklace in place when I wore it.

I decided to make a tassel tie, so I beaded one appropriate sized bead through both the ends, and tied a knot at the end. Using super glue to keep the knot in place is a good idea.
My re-purposed necklace is ready 🙂
16 comments for “Re-purposing a Bead Necklace”